
Smartwatch Band Replacement and Installation
Smartwatch band replacement starts with identifying the connector style and confirming model fit. The correct replacement method depends on the connector style, band width, release mechanism, and watch design. Check the connector style first.
A quick release band uses a small lever or release button to retract a pin, while a spring bar band relies on a pin seated between attachment points on the watch. A slide-in band moves through a case slot after its release mechanism is disengaged. An adapter-based band uses a separate adapter between the smartwatch band and the watch case. These attachment types can appear similar, so a replacement band should not be assumed to fit every model.
When a smartwatch band does not release easily, stop and identify the connector before applying force. Changing a band is separate from choosing materials or addressing long-term wrist comfort. The safe sequence is connector identification, compatibility checks, removal, installation, safety verification, and fit troubleshooting.
Caution: If a replacement band does not align with the case slot, spring bar, quick release mechanism, or adapter, fit may depend on a different connector style, band width, or model-specific design.
How smartwatch bands attach to the watch case
Smartwatch bands attach to the watch case through a release mechanism, spring bar, slide-in slot, or adapter rather than through strap material alone. The attachment method connects the strap end to the watch case by using components such as lugs, a case slot, or an adapter. This matters because the attachment mechanism determines the removal and replacement path.
How smartwatch bands attach to the watch case becomes easier to understand when the attachment points are visible. The image below labels the watch case, strap end, and connector areas that influence band replacement.
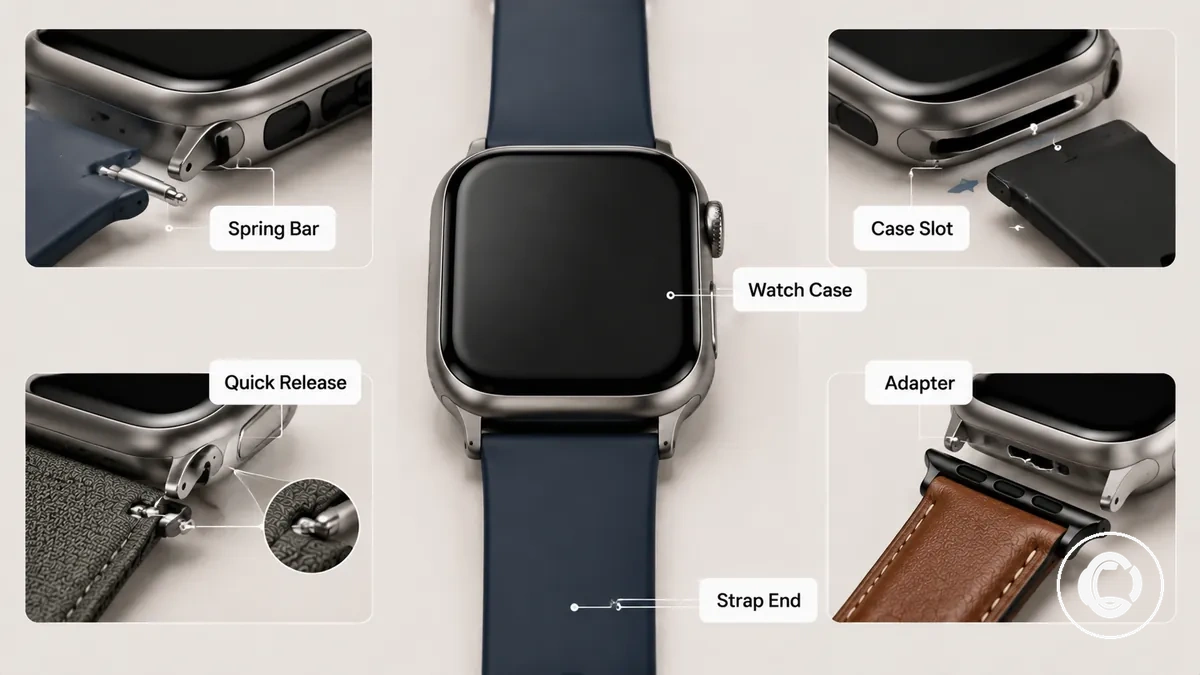
A smartwatch band with a quick release lever retracts a pin through a built-in release mechanism. A spring bar design uses a pin seated between lugs or lug holes on the watch case. A slide-in band moves through a case slot and may use a release button to disengage the connector. An adapter changes the connector shape between the strap end and the watch case. Proprietary buttons and case slots can change the action required, but identifying the connector first remains the key starting point.
How smartwatch bands attach to the watch case determines which replacement path applies. For a broader overview of connector types and band formats, see the smartwatch bands guide. The table below clarifies each attachment method by its removal implication.
| Attachment method | Visible cue | What changes during replacement |
|---|---|---|
| Quick release | Quick release lever near the strap end | The release mechanism retracts the pin before removal |
| Spring bar | Spring bar seated between lugs or lug holes | The pin position controls how the band disconnects from the watch case |
| Slide-in band | Case slot with a slide-in connector and release button | The band moves through the slot instead of separating from lugs |
| Adapter-based attachment | Adapter between the strap end and watch case | The adapter shape influences how the replacement band connects |
Checks before installing a replacement smartwatch band
A replacement smartwatch band should be checked before force is applied. Compatibility depends on the smartwatch case, band width, connector type, and attachment design. Stop if the replacement band does not line up with the case fit or connector points. Checks before installing a replacement smartwatch band also help verify the width cue, connector end, and strap orientation before fitting.
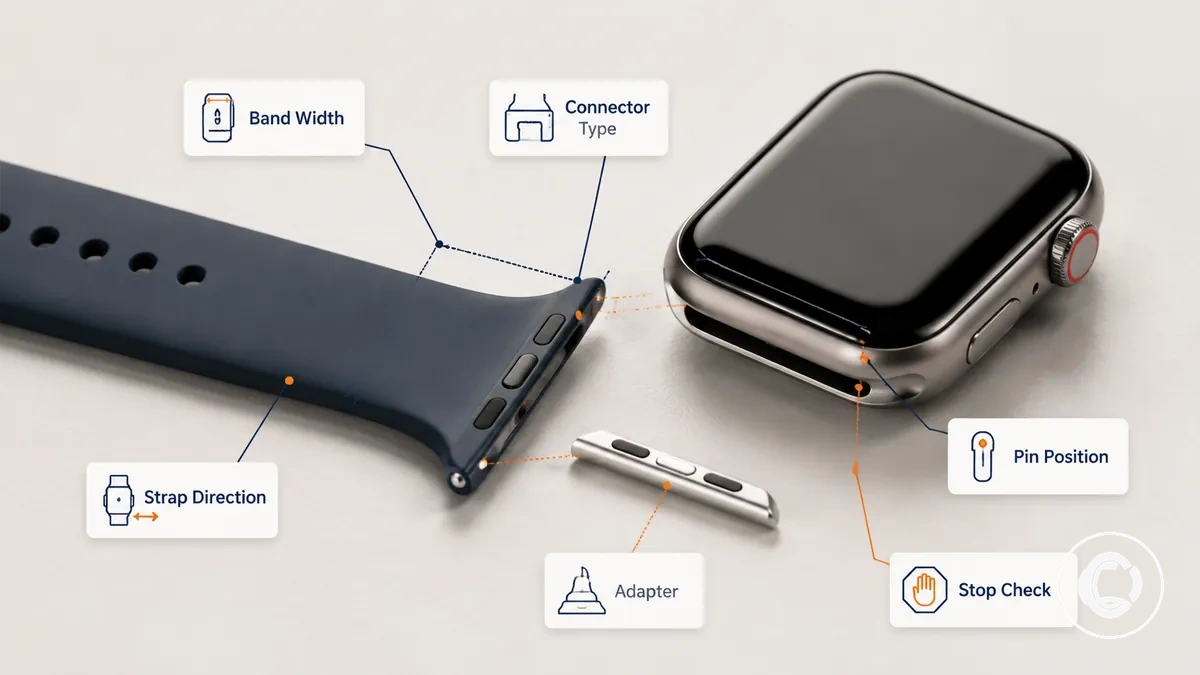
A replacement smartwatch band marked as 20mm may fit a 20mm lug width, while a 22mm band may fit a different case size when the connector type also matches. Connector type and adapter requirements should be checked before installation, and readers comparing compatible replacement bands should confirm whether a proprietary slot changes the connection method. Pin position and strap orientation should also align with the smartwatch case, because a reversed buckle side or tail side can affect installation. The checklist below verifies install readiness.
- Confirm the smartwatch model or case design matches the intended replacement smartwatch band.
- Check whether the band width matches the required size, such as 20mm or 22mm when applicable.
- Verify that the connector type matches the watch case connection method.
- Determine whether an adapter is needed between the replacement band and the smartwatch case.
- Check that the pin position aligns with the watch case attachment points.
- Confirm the strap orientation places the buckle side and tail side in the correct position.
- Stop if the band does not line up with the connector, proprietary slot, or case fit without force.
When one condition fails, do not force the replacement band into place. Recheck the mismatching width, connector shape, adapter requirement, pin position, or strap orientation. Installation may proceed after the unresolved condition is corrected.
Band width, connector type, and strap orientation
Band width, connector type, and strap orientation determine whether a replacement band can physically attach to the smartwatch case. Physical attachment depends on these fit variables matching the watch design. Check band width, connector type, and strap orientation before installation.
Band width, connector type, and strap orientation can reveal a mismatch before attachment is attempted. A band may match the lug width or slot size yet still fail if the connector type or pin position does not align. Readers checking the correct band size should also verify connector details and band direction. For example, a band with the correct width may still not attach when the connector type differs or the buckle side and tail side are reversed. The image and bullets below verify physical attachment variables.
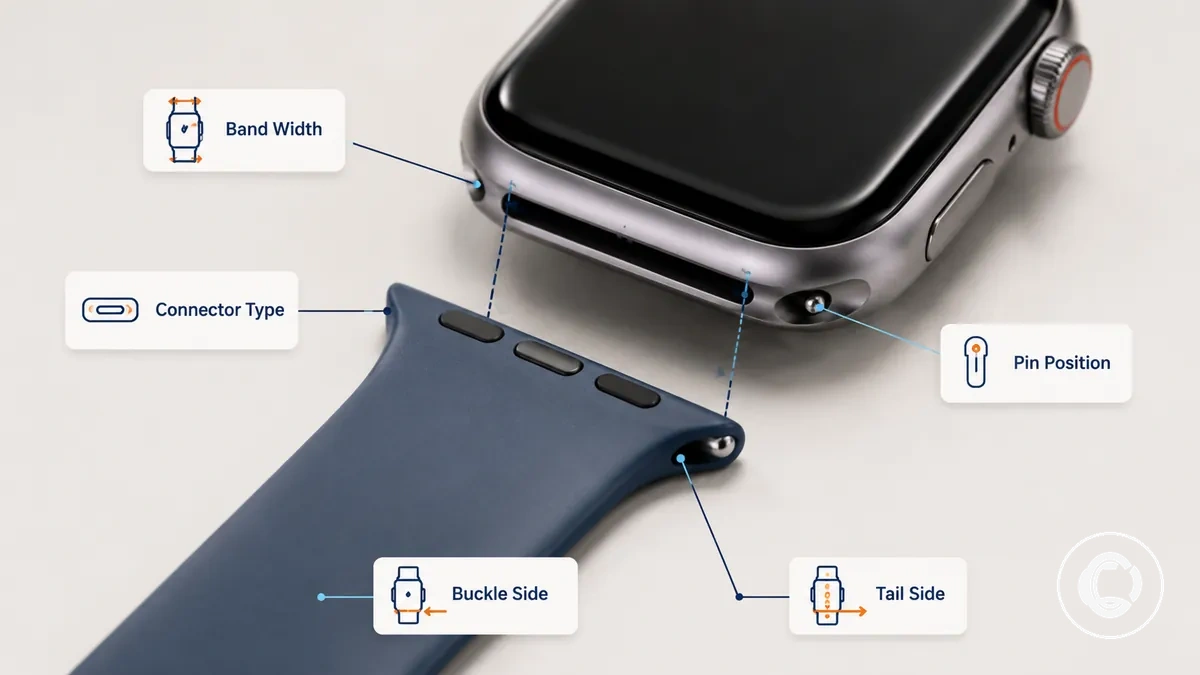
- Band width: Compare the band width to the lug width or slot size. A mismatch can prevent physical attachment.
- Connector type: Check that the connector type matches the watch case connection. A mismatch can create blocked locking or prevent attachment.
- Pin position: Confirm the pin position aligns with the attachment points. Misalignment can cause loose seating or inability to attach.
- Buckle side: Verify the buckle side faces the intended wear direction. Reversal can create incorrect strap orientation.
- Tail side: Check the tail side direction before installation. Incorrect placement can result in reversed wear direction.
Tools and parts needed for smartwatch band replacement
Tools and parts needed for smartwatch band replacement depend on the band mechanism. A replacement band that uses quick release pins may need different items than a band secured by spring bars, screws, adapters, or slide-in connectors. Tool choice varies by mechanism, so there is no one-tool-for-all assumption.
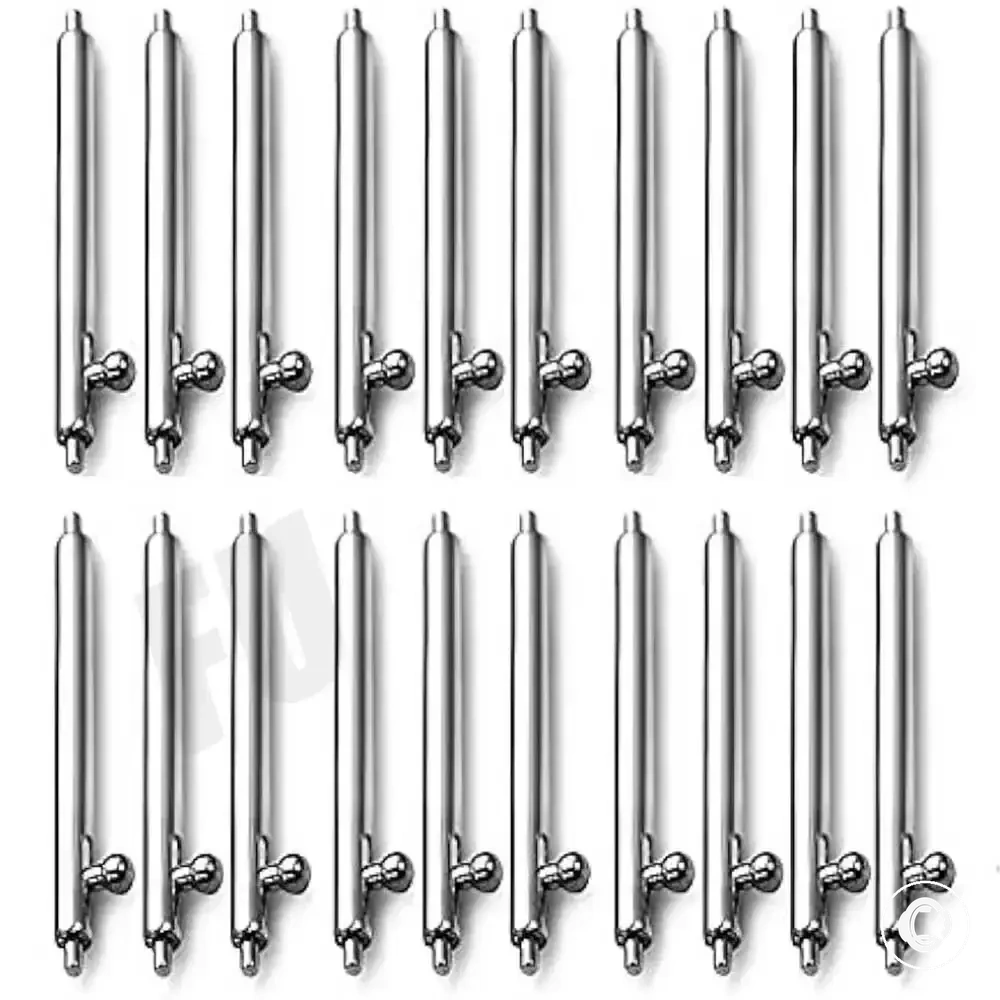
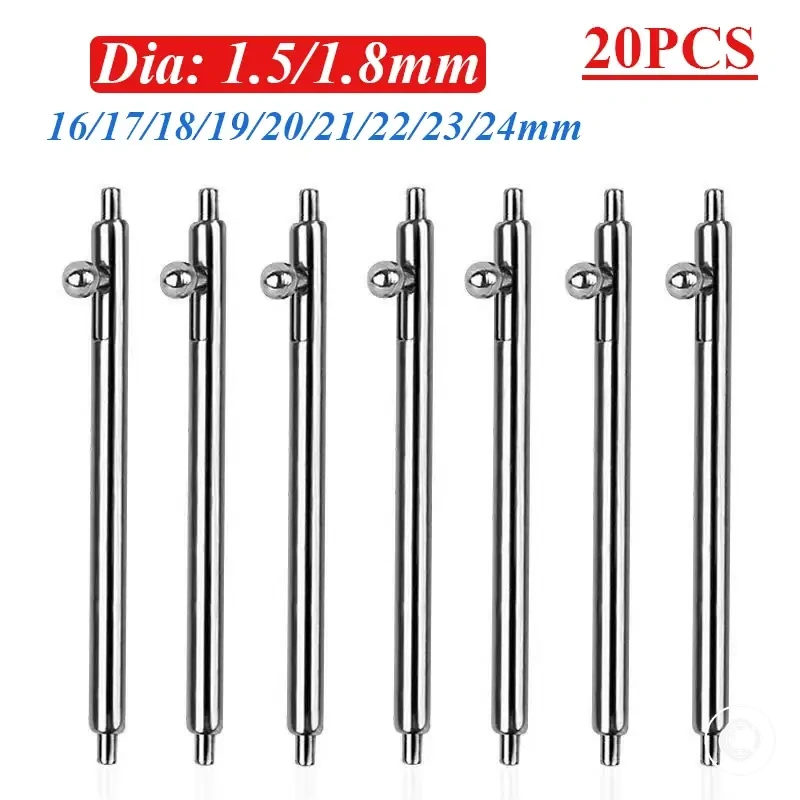
Tools and parts needed for smartwatch band replacement are easier to organize when the attachment mechanism is identified first. A replacement band is the main component, while a spring bar tool or forked tool may help when controlled compression is required. Spare strap pins can be useful when existing strap pins are missing or unsuitable for reuse, and an adapter or connector piece may be needed when the watch case uses a different connection style. A soft cloth can help reduce scratch risk during handling. The table below organizes tool need by mechanism.
| Item | Used for | Needed when |
|---|---|---|
| Replacement band | Replacing the existing strap | A new band is being installed |
| Spring bar tool | Compressing spring bars with a forked tip | The band uses spring bars that require controlled compression |
| Spare strap pins | Replacing missing or worn strap pins | The existing pins are unavailable or unsuitable for reuse |
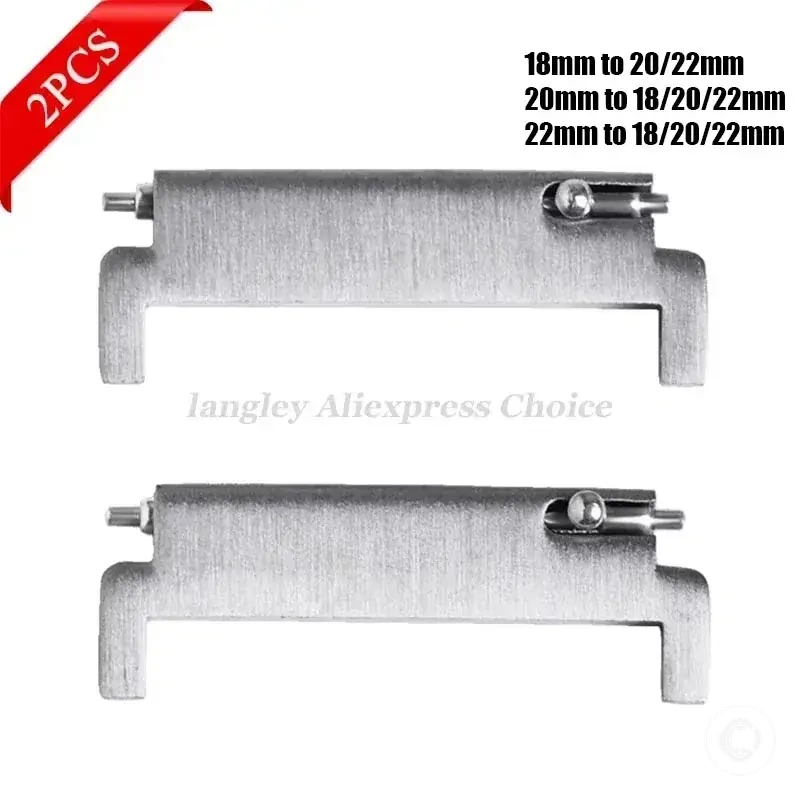
| Adapter | Connecting different attachment formats | The replacement band and watch case use different connection styles |
| Connector | Attaching the band to the watch case | The band relies on a separate connector piece |
| Soft cloth | Protecting surfaces during handling | The watch is placed on a work surface during replacement |
Quick release pins may allow a tool-free band change when a release lever is built into the band. Spring-bar bands often need a spring bar tool for controlled compression, while bands secured by screws may require a matching tool. If the mechanism is unclear, identify the attachment type before applying pressure or using a tool.
When a spring bar tool is needed
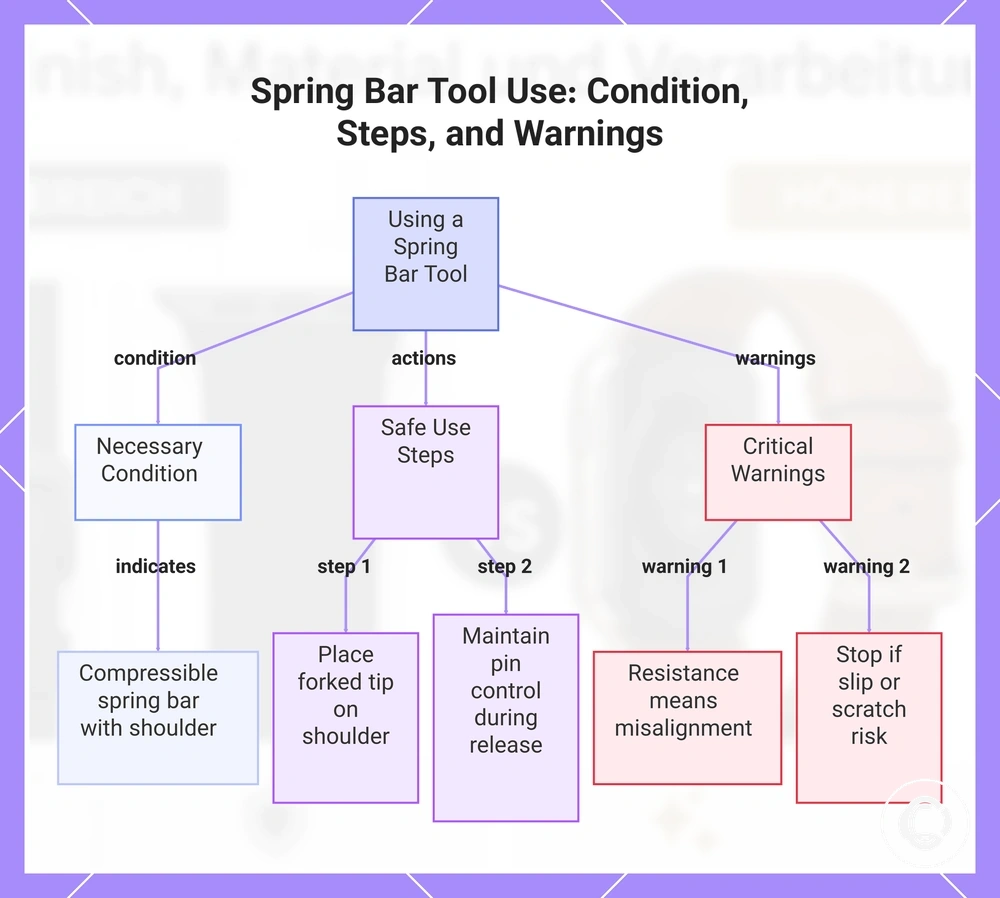
A spring bar tool is needed when the smartwatch band is held by a compressible spring bar rather than a button or quick release lever. The visible cue is a spring bar seated between the lugs, often with a spring-bar shoulder that can be reached by a forked tip.
Safe tool use depends on placing the forked tip on the spring-bar shoulder and keeping pin control as the bar compresses. Resistance usually means alignment or access is wrong, not that extra force is correct. Stop if the spring bar tool slips, the lug area is hard to see, or scratch risk increases.
Safe spring bar tool use:
- Do: Place the forked tip on the spring-bar shoulder before applying controlled compression.
- Do: Protect the lug area with a soft cloth when access is tight or scratch risk is higher.
- Do: Keep pin control as the compressible spring bar releases from the lug.
- Do not: Use extra force when resistance appears; recheck alignment and access first.
- Do not: Treat sharp substitutes as low-risk replacements for a spring bar tool.
This chart shows when a spring bar tool is needed, the safe steps to use it, and critical warnings to avoid damage.
Removing the old smartwatch band
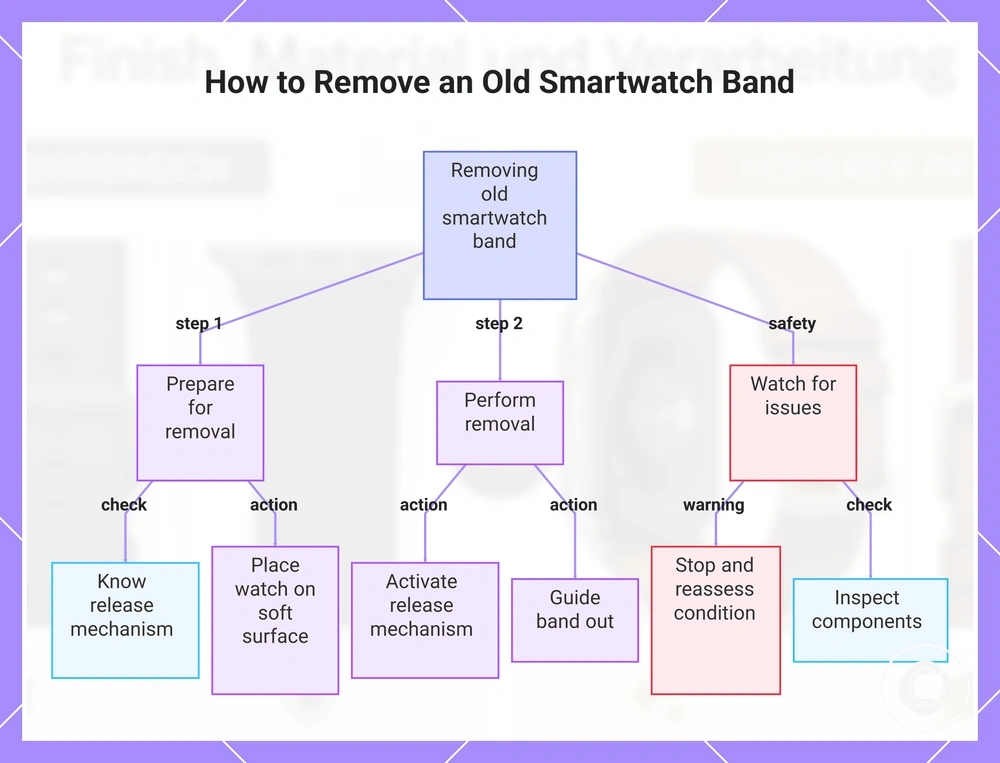
Removing the old smartwatch band depends on the connector that has already been identified. The correct removal path follows the release mechanism used by the current band. Place the watch face on a soft surface before starting.
Removing the old smartwatch band is easier when the release method is confirmed before touching the band end. Follow the sequence below, because the release button, quick release lever, spring bar, or slide-out movement controls the removal path.
- Place the watch face on a soft surface and hold the old smartwatch band securely. Stop if resistance appears because the watch or band end cannot be controlled safely.
- Access the release button or quick release lever and activate the release mechanism. Stop if resistance appears before the release component moves as expected.
- Compress the spring bar while maintaining pin control over the band end. Stop if resistance increases instead of decreasing during controlled movement.
- Guide the band through the required slide-out movement or release path. Stop if the band catches, binds, or moves unevenly.
- Remove the old smartwatch band and retain any loose pins or small parts. Stop if resistance remains after the release mechanism has been activated.
- Inspect the released components and place them aside for reference. Stop if a pin appears bent, damaged, or difficult to control.
When a damaged band is brittle, heavily worn, or held by damaged pins, repeated strap removal attempts may increase the risk of further damage. If resistance remains after checking the release mechanism, stop and reassess the condition of the old smartwatch band. Visible wear or damaged pins may indicate it is time to review when to replace a band.
This chart shows the main preparation steps, removal actions, and safety checks for removing an old smartwatch band based on its release mechanism.
Releasing a quick release smartwatch band
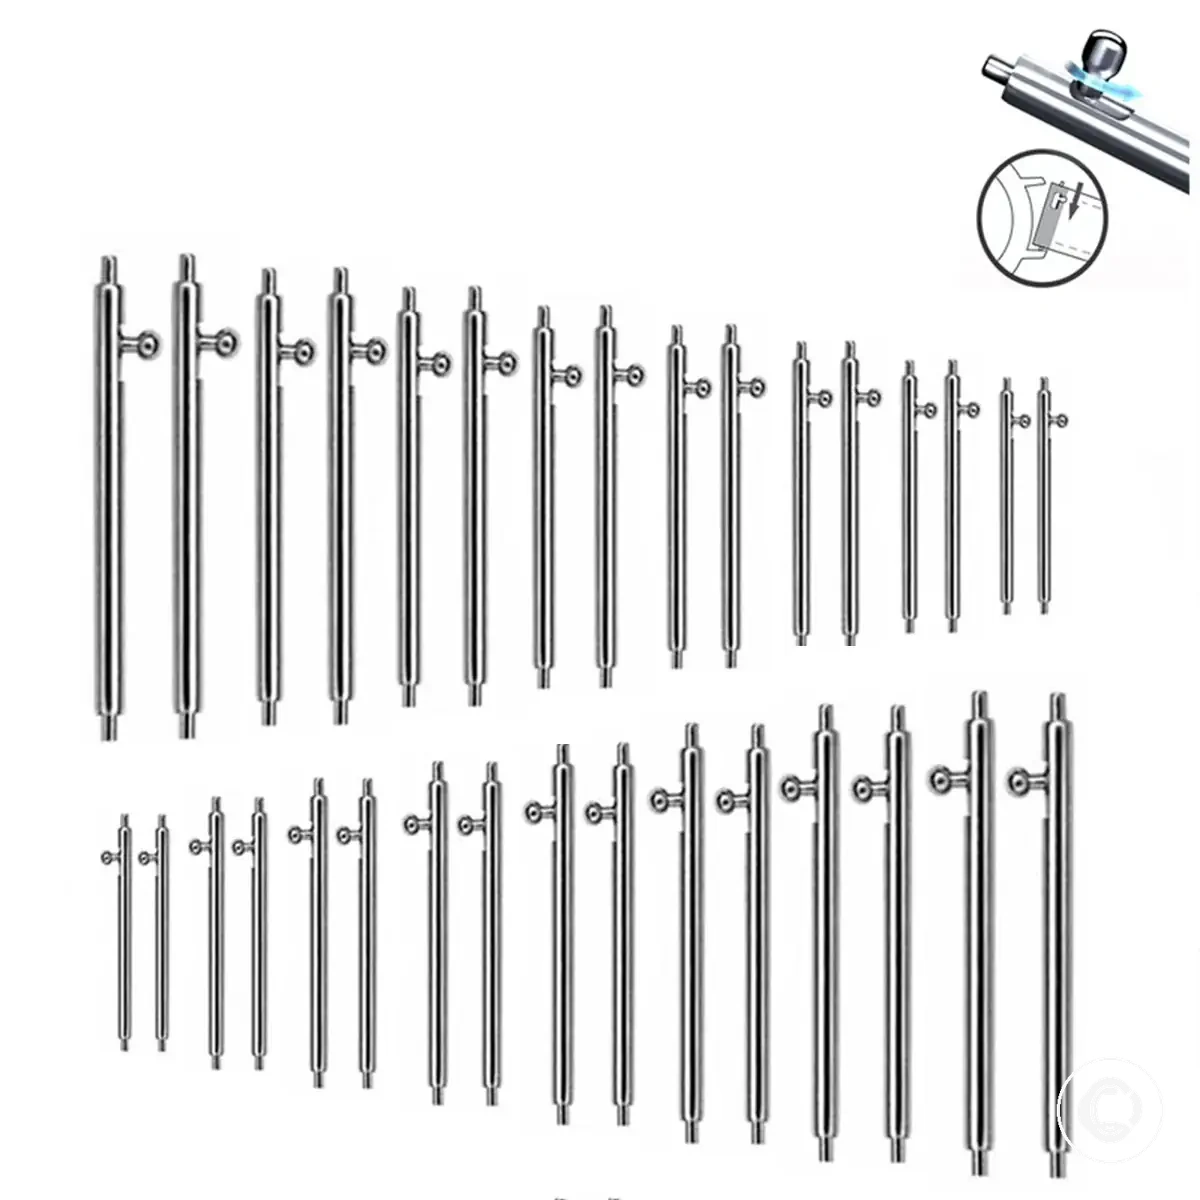
A quick release lever retracts the spring-loaded pin so the band can clear the lug hole. Move the quick release lever fully before lifting the strap end. When the lever is fully retracted, the strap should detach without prying.
If the quick release lever feels sticky, check whether the spring-loaded pin can retract fully before continuing. Stop if the lever does not move freely or the strap end does not begin to clear the lug hole.
- Slide the quick release lever toward the center of the strap end to retract the spring-loaded pin.
- Hold the quick release lever in the retracted position and guide the spring-loaded pin away from the lug hole until it begins to clear the lug.
- Keep the lever retracted while moving the strap end so the spring-loaded pin can clear the lug completely.
- Lift the strap end away and confirm the band detaches once the spring-loaded pin has cleared the lug hole.
Removing a spring bar smartwatch band
Removing a spring bar smartwatch band requires the spring bar to be compressed between the lugs before the band can release. Position the forked tool at the spring-bar shoulder through the lug gap.
When access is tight, visibility may be limited and pin retention can become harder to maintain. Use controlled inward pressure to compress the spring bar and release one end from the lug hole. Tape or a soft cloth can help with scratch prevention when working near the lugs.
- Insert the forked tool at a shallow angle through the lug gap until the forked tip reaches the spring-bar shoulder.
- Compress the spring bar inward at the shoulder while maintaining control of the strap end. Stop if the tool cannot remain seated securely.
- Keep pin retention as one end of the spring bar begins to release from the lug hole. Stop if the spring bar moves unpredictably.
- Confirm the release after one end clears the hole, then guide the strap away from the lugs with controlled movement.
- Remove the band and retain the spring bar for reuse when appropriate. Stop if the spring pin appears damaged or difficult to control.
Removing a slide-in band from a case slot
Removing a slide-in band from a case slot starts with a release button or latch that frees the slide-in band. Press the release mechanism before moving the band. Follow the slot direction used by the case slot.
A stuck band may not slide out if the release button or latch is not fully engaged. Press the release again and use gentle movement in the slot direction while keeping the watch stable. Avoid case twisting and use no force if the band does not slide.
- Stabilize the watch and locate the release button or latch associated with the case slot.
- Press the release button or latch and keep it engaged while the slide-in band begins to move in the slot direction.
- Guide the slide-in band through the case slot with controlled movement. Stop if resistance increases or case twisting begins.
- If a stuck band does not slide out, activate the release again and move the band gently through the band channel before considering additional pressure.
- Repeat the same release-and-slide process on the opposite side when the watch uses two separate slide-in band sections.
Installing the replacement smartwatch band
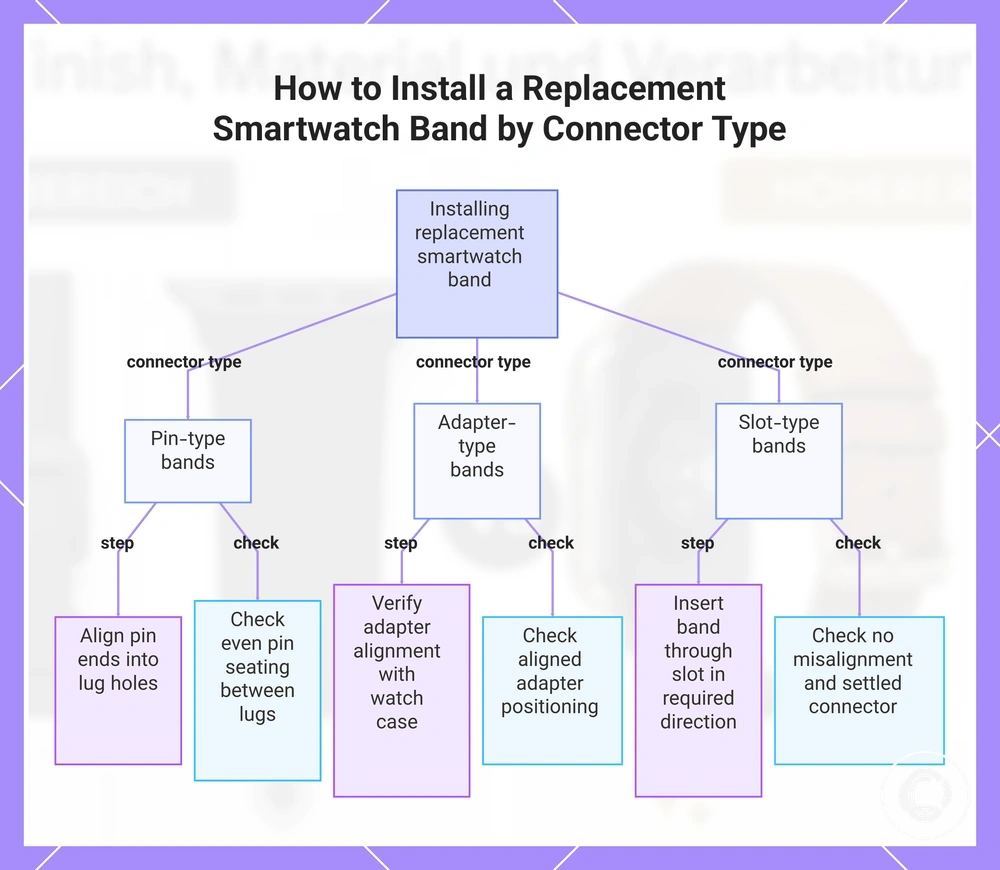
Installing the replacement smartwatch band follows the connector type already identified. The installation path may use pin seating, adapter positioning, or slot insertion depending on the watch design. Start with strap orientation first.
Installing the replacement smartwatch band becomes easier when the connector-specific alignment points are identified before attachment. Follow the steps that match the connector type in use, then confirm a lock cue before moving to the second side. Lock confirmation should be checked before continuing.
- Align the replacement smartwatch band so the strap orientation matches the intended buckle side and tail side. Confirm both band halves face the correct direction before seating any connector.
- If the replacement smartwatch band uses pins, align the pin ends with the lug hole and guide the first end into its seating point. Confirm pin seating by checking that the band end sits evenly between the lugs.
- If the replacement smartwatch band uses an adapter, verify adapter positioning before attachment. Confirm the adapter remains aligned with the watch case during installation.
- If the replacement smartwatch band uses a case slot, begin slot insertion in the required direction. Confirm the band moves through the slot without visible misalignment.
- Seat the remaining connector point using the same controlled alignment method. Confirm the connector appears properly positioned before proceeding.
- Check for a lock cue such as stable pin seating, aligned adapter positioning, or a settled slide-in connector. Confirm the connector remains seated after a gentle recheck.
- Repeat the same alignment and confirmation process on the second band half. Confirm both band halves remain aligned before finishing the installation process.
When both band halves are installed, recheck strap orientation, pin seating, adapter positioning, and slot insertion. Confirm that each side remains aligned and continues to show an appropriate lock cue after inspection. The replacement smartwatch band may be ready for normal wear when both sides remain properly seated.
This chart outlines the installation steps for pin, adapter, and slot connector types for smartwatch bands.
Attaching quick release pins securely
Quick release pins should seat with both pin ends positioned inside the lug holes. Pin length, lug hole alignment, and proper pin seating affect whether the band remains attached. A lightly pulled strap should remain in place without visible pin movement.
If incomplete seating occurs, a pin end may not be aligned with the lug hole or the quick release lever may not have fully released. Check alignment and repeat pin seating if visible pin movement appears under light strap tension. Reseat the pin before continuing.
- Place the first pin end into the first lug hole and keep the band aligned with the watch case.
- Continue retracting the lever so the spring-loaded pin shortens enough for the opposite side to align with the second lug hole.
- Guide the second pin end toward the second lug hole while maintaining alignment between the band and the watch case.
- Release the lever and allow the quick release pins to extend into the lug holes. Confirm the pin ends appear seated after lever release.
- Apply light strap tension and check for visible pin movement. If movement or incomplete alignment is present, reseat the quick release pins and repeat the check.
Seating spring bars between the lugs
Seating spring bars between the lugs starts by placing one tip into a lug hole and compressing the other tip into position. The spring bar should remain centered in the strap end so the bar tip and lug hole stay aligned.
When a curved strap or thick strap resists alignment, a slower angle adjustment may help the spring bar reach the seating point. Lug hole visibility can vary, so confirmation may depend on alignment and seating rather than appearance alone. If the spring bar does not seat correctly, reseat it rather than continuing with incomplete alignment.
- Center the spring bar inside the strap end and position one tip at the first lug hole.
- Seat one tip into the lug hole and confirm the spring bar remains centered in the strap end.
- Compress the opposite bar tip and guide it between the lugs while maintaining alignment with the second lug hole.
- Release compression gradually and allow the bar tip to enter the lug hole when alignment is reached.
- Check for a secure seat by confirming both spring bar tips remain positioned in the lug holes without shifting during a gentle recheck.
Fitting adapters and replacement connectors
An adapter or replacement connector acts as the interface between a standard strap and a smartwatch case. The case-side connector must align with the watch case, while the strap-side spring bar or retention point must align with the strap. Adapter size, connector shape, and strap width can vary, so installation depends on model fit and correct alignment conditions.
When installation order is incorrect, misalignment can occur between the case-side connector and the strap-side spring bar. Attach the adapter to the strap first when required, then align the adapter with the watch case using the intended insertion direction. Stop if the adapter size, connector shape, retention method, or strap width does not match the installation points.
- Check that the adapter size matches the strap width and that the replacement connector matches the case-side connector shape.
- Attach the adapter or replacement connector to the strap using the strap-side spring bar, screw retention, or pin retention required by the connector design.
- Align the adapter with the watch case and follow the intended insertion direction before seating the connector.
- Secure the retention point and confirm the adapter remains aligned with the case-side connector during installation.
- Check for misalignment between the adapter, strap, and watch case. Continue only when the adapter matches the watch model and strap width.
Checking the band after installation
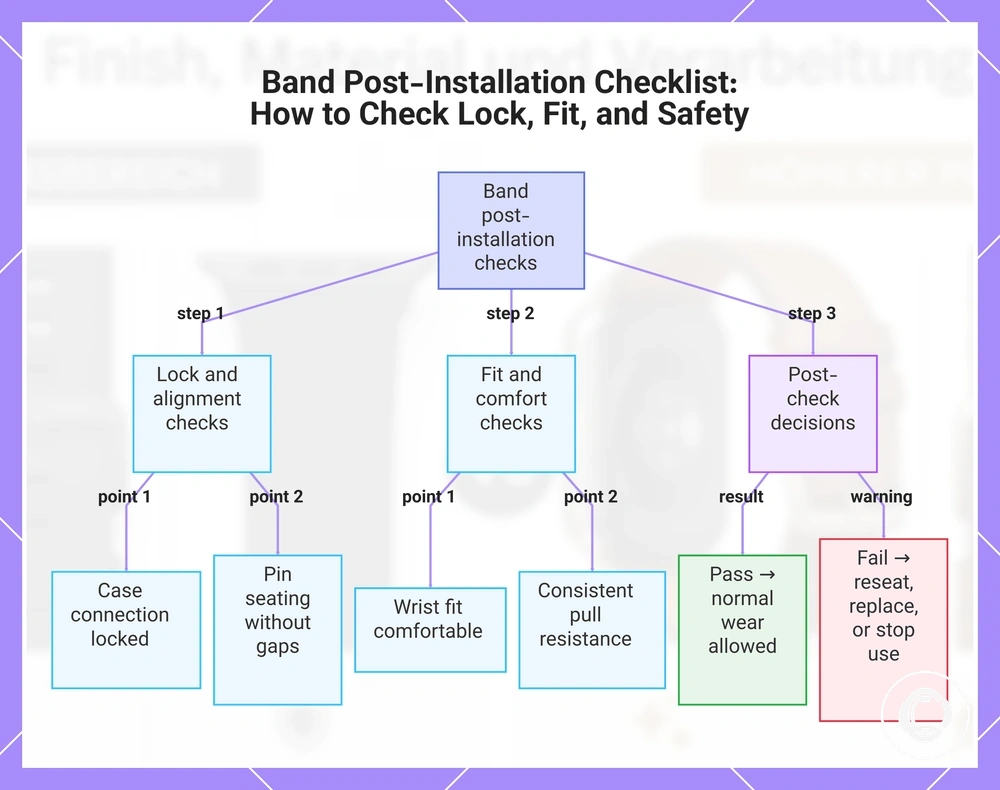
Checking the band after installation is necessary before normal wear. The installed band is not ready until post-installation checks confirm it is locked, aligned, and comfortable enough to wear. These checks support safer wear decisions after installation.
When a replacement band appears aligned, additional verification is still needed. Checking the band after installation helps confirm whether the band is locked, aligned, and usable for wear. The checklist below verifies case connection, pin seating, adapter flushness, strap orientation, pull resistance, and wrist fit.
- Confirm the case connection remains locked without visible shifting.
- Check pin seating for proper positioning and absence of visible gaps.
- Verify adapter flushness where an adapter or replacement connector is installed.
- Confirm strap orientation matches the intended buckle and tail direction.
- Apply a gentle pull test and check for consistent pull resistance.
- Check wrist fit for comfort without unusual movement or looseness.
- Inspect pins, connectors, and attachment points for signs that may require a reseat.
If the installed band passes the lock check, alignment check, and wrist fit review, normal wear may be appropriate. If pin seating appears incomplete, reseat the band and repeat the post-installation checks. If a pin appears damaged or cannot remain positioned correctly, replace the pin before further use. Stop using the band if gaps, movement, or attachment problems remain after rechecking.
Checking the band after installation should end with a final review of lock status, alignment, adapter flushness, and comfort. Continue only when the replacement band remains locked, aligned, and stable during normal handling.
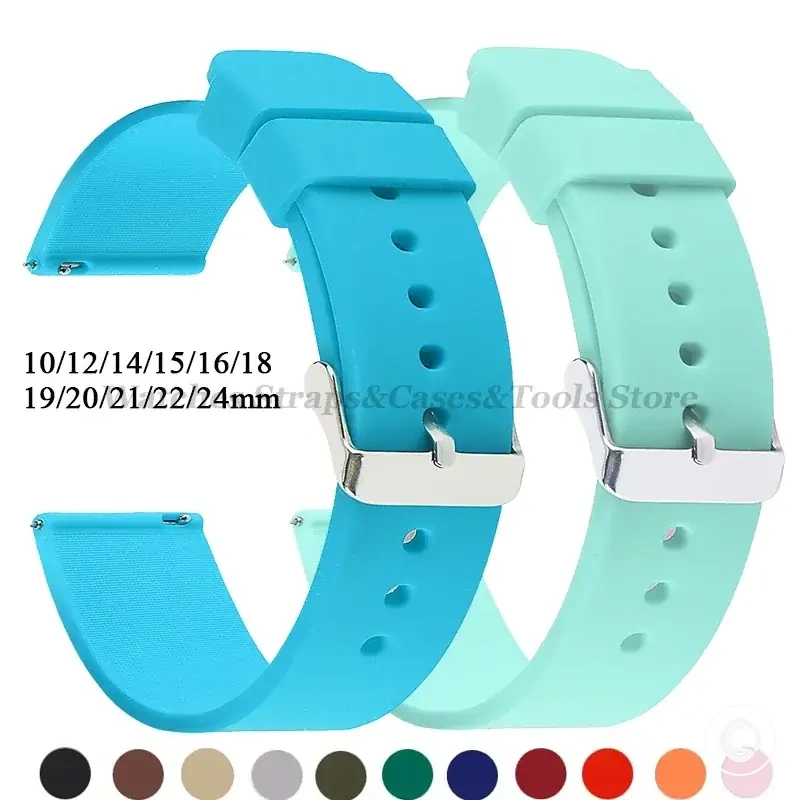
Here are product examples that may make comparison easier. Before buying, always review the compatibility criteria, essential features, and product details.
This chart shows the necessary post-installation checks for a replacement band, including lock and alignment checks, fit and comfort checks, and the resulting decisions for safe wear.
Locking, alignment, and pull-test checks
Locking, alignment, and pull-test checks verify different failure points after installation. Locking checks retention, alignment checks positioning, and the pull-test checks movement under gentle pull only.
If the band moves, gaps appear, or one side shifts, the install has not passed verification. A band can look seated but still fail when one pin end missed the lug hole. Reseat the band before normal wear if movement, uneven gap symmetry, or missed pin seating appears.
- Locking: Check lock feel at the connector; loose movement can signal failed pin seating or adapter seating.
- Alignment: Check gap symmetry on both sides; uneven gaps can mean the band needs to be reseated.
- Pin seating: Confirm each pin end is positioned in its lug hole; a missed lug hole can make the band look seated but move under pull resistance.
- Adapter seating: Confirm the adapter sits flush; tilt or movement can signal a failed install.
- Strap direction: Confirm strap direction before wearing; reversed direction means the band should be removed and reseated.
- Pull-test: Apply a gentle pull and stop if visible movement appears; movement is a stop signal, not a reason to pull harder.
When the replacement smartwatch band does not fit
When the replacement smartwatch band does not fit, the cause is usually a wrong width, connector type mismatch, adapter issue, pin position problem, strap orientation error, or case-slot mismatch. The replacement smartwatch band may fail to attach even when parts appear similar. Each symptom should be checked against a specific cause before attempting a correction.
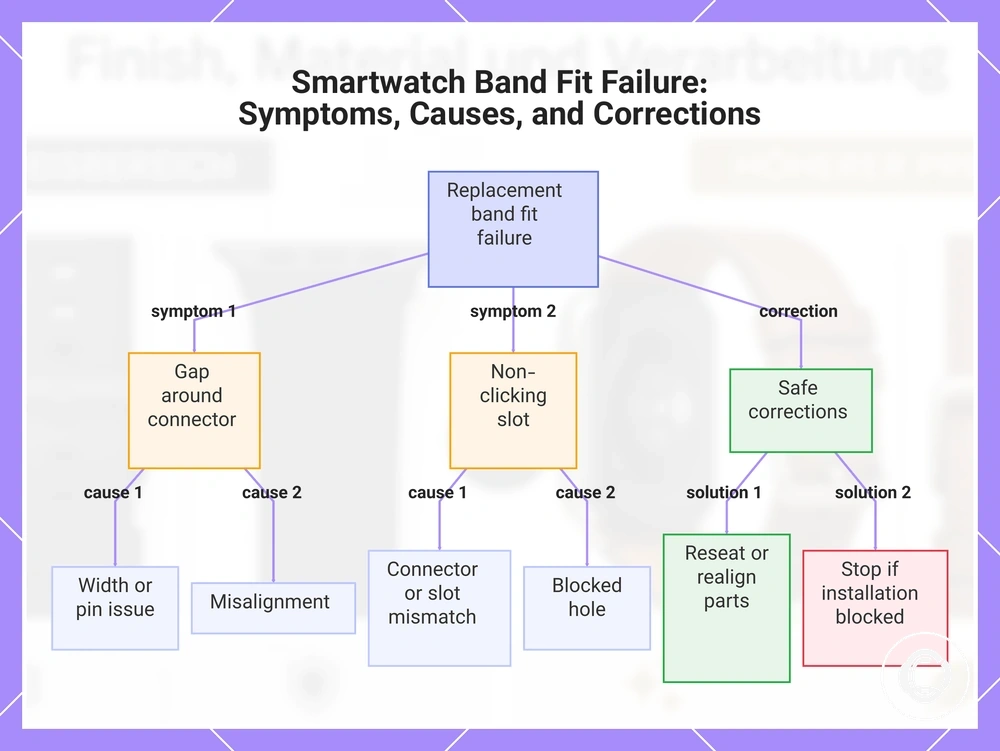
When the replacement smartwatch band does not fit, each symptom points to a different likely cause. A gap may indicate misalignment, while a non-clicking slot may indicate a case-slot mismatch or connector issue. Short pins, a loose adapter, or a blocked hole can prevent proper attachment. The diagnostic sequence below follows symptom-to-cause logic.
Gaps around the connector may suggest misalignment, incorrect pin position, or a wrong width. A non-clicking slot may indicate a connector type issue, case-slot mismatch, or blocked hole. Short pins may not reach the attachment points, while a loose adapter may shift during installation. A reversed strap can also prevent proper orientation, so the safe correction is to reseat, realign, or replace the affected attachment component before continuing.
A common misconception is that attachment failure and wearable looseness are the same problem. A replacement smartwatch band that cannot attach correctly has an installation-related fit failure, while a band that attaches but feels loose or tight involves a different diagnostic path. For guidance beyond attachment issues, see fit problems after replacement.
Reseat parts when misalignment is present, replace components that cannot attach correctly, and stop when a case-slot mismatch, blocked hole, or connector type issue prevents installation. Continue only after the replacement smartwatch band attaches without visible fit failure or attachment problems.
Here are product examples that may make comparison easier. Before buying, always review the compatibility criteria, essential features, and product details.
This chart shows two common symptoms of a replacement band that won't attach, their likely causes, and recommended corrective actions.
Wrong band width or connector size
Wrong band width or connector size can prevent the strap or connector from lining up with the watch case or locking correctly. The visible cue is a band end, adapter, or pin that does not sit squarely at the case connection.
Band width should be separated from connector profile before deciding what failed. A 20mm band used where 22mm lug width is needed is a width mismatch, while a band with the right width but the wrong connector profile may still fail on a proprietary case connection. Stop and recheck lug width, slot width, adapter size, connector profile, and pin length before trying to seat the band again.
- Band end leaves side gaps: The likely mismatch is band width against lug width or slot width; recheck the required case width before continuing.
- Band is marked 20mm but the case needs 22mm: The likely mismatch is strap width, not necessarily the connector type; use the correct width condition before checking other parts.
- Correct 20mm or 22mm width still does not lock: The likely mismatch is connector profile or proprietary connector shape; recheck the case-side connection instead of assuming width alone is enough.
- Adapter shifts or sits unevenly: The likely mismatch is adapter size or connector shape; stop if the adapter cannot align squarely with the case.
- Pin does not reach the seating point: The likely mismatch is pin length or blocked hole access; recheck pin position and do not continue if seating is incomplete.
- Slot connector will not slide or click: The likely mismatch is slot width, case-slot shape, or connector size; remove the band and recheck the slide path before another attempt.
Pins, adapters, or case slots not lining up
When pins, adapters, or case slots are not lining up, the alignment failure usually means the part is close to fitting but not fully seated. Check the seating issue before continuing, and do not apply force to make the band lock.
Inspect pins, adapters, and case slots individually to identify what is preventing alignment. Alignment failure may result from bent pins, short pins, off-center spring bars, blocked slots, adapter orientation, or connector misalignment. Escalate only when damaged slots, stripped screws, or repeated alignment failure remain after correct inspection and rechecking.
- Bent pins: The alignment symptom is a pin that will not enter the lug holes evenly. The safe correction is to stop and replace the pin rather than continue with a damaged component.
- Short pins: The alignment symptom is incomplete seating or failure to reach the attachment point. The safe correction is to verify pin length and recheck seating before another attempt.
- Off-center spring bars: The alignment symptom is one side seating while the opposite side remains outside the lug holes. The safe correction is to recenter the spring bar and recheck alignment.
- Adapters: The alignment symptom is uneven seating or connector misalignment against the watch case. The safe correction is to verify adapter orientation and reseat the adapter before continuing.
- Blocked case slots: The alignment symptom is a connector that stops before reaching its seated position. The safe correction is to inspect the case slots for obstruction and recheck the insertion path.
- Stripped screws or connector misalignment: The alignment symptom is repeated lock failure despite correct positioning. The safe correction is to stop and escalate when correct alignment no longer resolves the seating issue.